Tank Setup
Aquascaping Basics: Hardscape, Layout, and Focal Points
Learn how to use driftwood and rocks to build a balanced aquascape. Covers layout styles, the rule of thirds, focal points, and preparing hardscape safely.
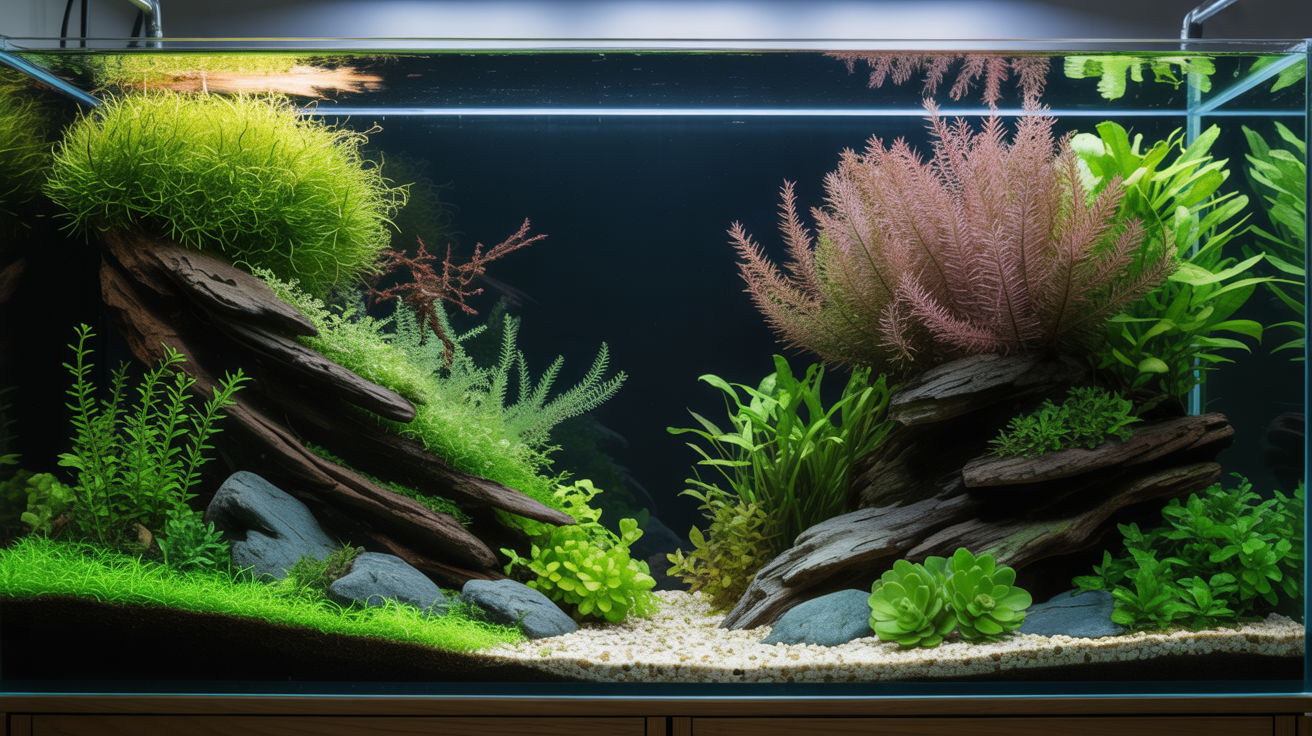
Aquascaping is the art of arranging plants, rocks, and wood inside an aquarium so the whole scene holds together visually. It sounds fancier than it is. At its core, you are deciding where things go and why, not trying to win a contest. Even a modest twenty-gallon tank with a few stones and a piece of driftwood can look genuinely nice when the basic principles are respected.
This guide focuses on hardscape: the non-living structural elements like rocks and driftwood that form the skeleton of your layout. Fish and plants get layered in afterward, but hardscape decisions are made first, and they are hard to undo once the tank is running. Getting comfortable with these ideas before you fill the tank saves a lot of drained-and-restarted frustration.
What Hardscape Actually Does
Hardscape serves two functions at once. Visually, it creates structure and depth. Practically, it gives fish places to hide, claim territory, and feel secure. A tank with bare substrate and no visual cover stresses many species. The rocks and wood you choose for their looks are also contributing to animal welfare, which is a nice alignment of goals.
The two materials you will encounter most often are driftwood and rocks. They can be used separately or together, and they behave quite differently in water.
Driftwood releases tannins that soften and acidify water slightly, stain it amber-brown, and lower pH over time. Many fish from South America and Southeast Asia thrive in these conditions. The tannin color bothers some hobbyists and suits others completely. It fades with water changes.
Rocks generally do the opposite. Most inert rocks like dragon stone, seiryu stone, and lava rock have little to no effect on water chemistry. Some rocks, particularly limestone and anything with white veining, dissolve slowly and raise hardness and pH. A simple test: drop a small amount of vinegar on the rock. If it fizzes, it contains calcium carbonate and will affect your water over time.
Before building anything, know your fish. Soft acidic water species and hard alkaline species have very different hardscape requirements, and the rock you choose matters. If you are still deciding on fish, the guide on choosing your first aquarium covers this pairing logic.
Preparing Hardscape Before It Goes In the Tank
Neither driftwood nor rocks should go straight from the store or the garden into your aquarium.
For driftwood:
- Scrub it thoroughly with a stiff brush under hot water. No soap, no detergents.
- Soak it in a bucket of plain water for several days, ideally longer. Change the water daily. This leaches out the heaviest tannin load and also waterloggs the wood so it sinks instead of floating.
- Some driftwood floats for weeks regardless. You can anchor it with a suction cup and silicone, weight it with a flat stone, or just accept a longer soaking period. Boiling works for smaller pieces; a large pot of boiling water for an hour speeds up the waterlogging and sterilizes the surface.
For rocks:
- Scrub with a brush under hot water.
- Check for sharp edges. Some seiryu stone is quite jagged. Fish like corydoras, plecos, and any species that rests on or nuzzles substrate can cut themselves on rough rock. Smooth any really aggressive points with sandpaper, or choose stones with gentler texture.
- Do the vinegar test if you are unsure about composition.
- Rinse everything before placing it.
Nothing about this step is difficult; it just takes a little lead time. Plan hardscape prep into your tank setup timeline.
Layout Styles Worth Knowing
Before you start moving things around in the dry tank, it helps to have a rough mental template. Three layouts come up constantly in beginner aquascaping resources, and for good reason: they work.
The Iwagumi style uses only rocks, no wood, arranged in an odd-numbered grouping. One stone is clearly dominant; the others are subordinate. The substrate is typically light-colored fine sand, and the plants, if any, are low and carpeting. The effect is minimalist and serene. It is harder than it looks because every element is visible and the balance must be precise.
The Nature Aquarium style, associated with Takashi Amano's approach, combines rocks and/or driftwood with dense planted growth. The hardscape provides structure, and plants soften and fill around it. This is the most forgiving style for beginners because plants cover a lot of compositional mistakes.
The Dutch style is plant-forward and uses less exposed hardscape, focusing instead on contrasting species of plants arranged in rows or blocks. You can still use some rocks or wood as accent pieces, but they are not the dominant element.
For a first attempt, the Nature Aquarium approach is the most accessible. You get to use both driftwood and rocks, plants do a lot of the visual work, and there is room to adjust as plants grow in.
The Rule of Thirds and Focal Points
This is the single most useful compositional idea to carry into hardscape placement.
Divide your tank into thirds both horizontally and vertically, the way a tic-tac-toe grid would. The four points where those lines intersect are called focal points. In most pleasing compositions, the most visually interesting element, your largest stone, your main piece of driftwood, a dramatic branching root, lands near one of these intersection points rather than dead center.
Centering the main hardscape piece is the most common beginner mistake. It creates a perfectly symmetrical layout that reads as flat and static. Off-center placement creates tension and draws the eye, which is what you want in a living display.
A few practical rules from this:
- Place your main focal piece at roughly one-third from either the left or right wall.
- Secondary elements can echo the primary placement at other intersection points, or they can recede into the background.
- Leave the remaining two-thirds of the substrate relatively open or planted low, creating visual breathing room.
The open space is not wasted space. It is what makes the focal piece read as important.
Creating Depth and Negative Space
A two-dimensional photograph of an aquarium can look flat even when the actual tank has dimension. Most beginner layouts struggle with depth because everything is placed at the same distance from the front glass.
A few techniques address this:
Layer the substrate. Slope it higher toward the back of the tank. Even a gentle slope from two or three centimeters at the front to seven or eight centimeters at the back adds a sense of ground rising toward the horizon. It also improves plant root depth where it matters most.
Vary stone placement front to back. Place a smaller satellite stone closer to the front glass, the main stone in the middle ground, and perhaps a third partial stone just visible at the back. The eye reads this as a landscape receding into distance.
Use negative space deliberately. A clear path of pale substrate leading from the front of the tank toward the back, sometimes called a sand river, creates depth and also gives small fish and bottom dwellers space to explore and display.
Choose plants by height. Foreground plants should be short and ground-hugging. Midground plants build up. Background plants fill the back wall. This vertical layering reinforces the sense of depth that the hardscape creates structurally.
Fish behavior also interacts with layout depth. Bottom-dwellers like corydoras and loaches will use the open foreground. Mid-level schooling fish will cruise the open water column. Surface species interact with any wood or roots that reach upward. When hardscape matches fish movement patterns, the tank feels alive rather than staged. Keeping that welfare piece in mind while designing is worth the effort; a layout that works for the fish tends to look better too.
Putting It Together Before You Add Water
The best time to adjust hardscape is before the tank is filled. Lay down your substrate, place your driftwood and rocks dry, and then step back and look at it from the front. Take a photo. Look at the photo. It is much easier to evaluate composition in a photo than in person, possibly because you stop seeing the individual pieces and start seeing the whole scene.
Check that your main focal piece is off-center. Check that nothing is symmetrically mirrored. Check that there is some open substrate. Look for unintentional gaps between hardscape pieces that will look odd when the tank is full but fish are visible. Push pieces closer together or farther apart. Tilt a stone slightly. Overlap the base of a driftwood piece with a small stone to anchor it visually.
Once you are reasonably satisfied, add substrate to lock pieces in place before filling. Fill slowly, either by placing a plate or plastic bag on the substrate and running water onto that, or by using a hose on low flow. Sudden water pressure disturbs everything you just arranged.
Then comes the waiting: cycling the tank before fish go in. If you have not done that yet, the nitrogen cycle guide walks through it in plain terms. A well-arranged tank that has not cycled is still not ready for fish, so patience at this stage matters as much as the layout work.
Frequently Asked Questions
Do I have to use live plants with hardscape?
No. Plenty of attractive tanks use only rocks and driftwood with no plants, and some fish actively prefer it. Cichlid tanks and many biotope setups are hardscape-only. Live plants add oxygen, absorb nitrates, and compete with algae, so they are genuinely useful, but they are not required to make aquascaping work.
How many rocks or pieces of driftwood should I use?
There is no fixed number, but odd numbers tend to read more naturally than even ones. A grouping of three stones looks more dynamic than four of equal size. For driftwood, one substantial piece often reads better than several smaller ones fighting for attention. Simplicity is easier to control than complexity.
My driftwood keeps floating even after soaking. What now?
Some wood, especially Malaysian driftwood, is very dense and sinks relatively fast. Others, like cholla wood or certain spiderwood varieties, take weeks. If patience runs out, anchor the piece: a flat stone placed over the base, a zip tie to a suction cup on the bottom glass, or food-grade aquarium silicone bonding it to a small slate tile. Once the wood is fully waterlogged it will stay put on its own.
Will rocks scratch the bottom of my glass tank?
Heavy rocks placed directly on bare glass can crack the tank, particularly if there is an air pocket underneath. Always add substrate first, then place rocks onto the substrate. For very large or heavy stones, placing a thin cut of foam mat under the glass at the base of the tank adds a margin of protection, though this is more relevant for very large tanks or unusually heavy stone arrangements.
Can I mix driftwood and rocks in the same tank?
Yes, and it tends to look more natural than using just one material. Rock and wood together read like a riverbed or forest floor. Just be mindful of the chemistry: if you have very soft-water fish and you are using tannin-releasing driftwood to lower pH, introducing limestone or calcium-rich rocks at the same time works against that. Match your hardscape to your water target and your fish species.